The development of Canon printers made our life simple and easier in many ways. We can use these printers in many ways from printing labels to printing signboards.
Henceforth, we are offering you one of the most efficient Canon printer models of this era- Canon TS3122 and we will be covering a nuisance of related details in this article.
For example, we will be discussing the crucial details about your printer setup via ij.start.cannon TS3122 and a lot more.
On the other hand, before going into the technicalities, we will be stressing on a diverse things that you might know so that you can understand your printer in a better way.
This printer has been created for budget-friendly personal printing requirements. It has the Air-print feature which is compatible with iPhone and iPad which doesn’t have in other printers.
You can easily connect it to Wi-Fi and can print from any area of your house.It has a ‘Hybrid Ink System’ feature which makes fine printing experience to a large extent. In case you connect it with a smartphone, you can achieve scanning and printing tasks from your device.
When you get its canon printer drivers downloaded from the canon.com/ijsetup webpage, you will access the ‘QUITE MODE’ attribute using which you can carry on with the printing task without tending to disturb others.
100 percent performance from trustworthy ink cartridges at cheap rates as compared to authentic Canon Ink. Several customers have recommended this product.
Avail BIG SAVINGS while using compatible canon Pixma ts3122 ink cartridge replacements with your Canon PIXMA TS3122 printer. It functions like an authentic Canon cartridge at the best price. Genuine ink cartridges are also available. canon pixma ts3122 ink refill
This Canon TS3122 also uses Canon PG-245 black and Canon CL-246 tricolor ink cartridges. Both these cartridges come in XL high yield sizes.
You will save up to 27% when you shop 3-pack inkpads.
Using the printer –
Printing –
Printing from computer, and paper settings.
Printing from computer –
Printing from smartphones and tablets –
Printing from digital camera –
Printing Photographs Directly from PictBridge (Wireless LAN) Compliant Device PictBridge (Wireless LAN) Print Settings.
Paper settings -
By registering the paper size of loaded paper on the given rear tray, you can avoid printer from misprinting by displaying the error code before printing starts when the paper size of the loaded paper differs from its print settings.
Ex:
Paper size setting for printing: A5
Paper size setting set to the printer: A4
When you begin printing, an error code gets displayed on the LCD.
Understanding and resolving Canon Pixma TS3122 error code which gets displayed on PIXMA TS3122 printer or computer screen.
When an error generates during printing let’s say, in case the paper runs out of jams, you can see:
| Error code | Support Code | Cause | Action |
| E02 | 1000 3442 3443 3444 3445 |
Printer is out of paper. Printing one side is complete if you're performing home-made duplex printing. If the printer is out of paper. |
Cargo paper in the hinder charger.Align the paper companion with the paper mound. Press the printer's Paper Select button to elect the paper size in the hinder charger. If you perform homemade duplex printing Follow the instructions on the computer screen to print the other side |
| E03 | 1203 1300 |
Try not to open or close the cover during printing. Close the cover and renew the print job. Paper is jammed Still, sluggishly pull out the paper with both hands and close the cover, If paper remains inside the printer. Press the printer's OK button to renew. Videotape Watch a videotape about how to remove paper jam. Still, or if the jam cannot be removed, your printer will bear servicing, If you were suitable to remove the paper jam but the error remains. There are two options presently available to you. Warranty Service – If you're within the 1- time manufacturer’s bond and have your evidence of purchase you're entitled to service or replacement.However, you may be entitled to fresh options, If you have bought a CarePak Canon extended bond. Please produce or log into your Canon Account to gain service. Out of Bond – If you're outside of your bond period, you may qualify for copping a relief through the Canon Upgrade Program. |
|
| E04 | 168A | Ink cartridge hasn’t been installed correctly. | Pull out the paper affair charger and charger extension. Open the cover and remove the essay charges. Make sure the charges are compatible with the printer, and if demanded, replace FINE charges. Push up on the cartridge until it clicks into place, also close the cover. |
| E05 | 1401 1403 1430 1485 |
Ink cartridge can’t be recognized. | Check the following. Essay cartridge is installed duly. Applicable essay cartridge is installed. Essay cartridge is compatible with the printer. Still, replace FINE charges, If demanded. |
| E08 | 1700 1712 1714 |
Ink absorber is almost full. | Press the printer's OK button to continue publishing. Service will soon be needed. There are two options presently available to you. Warranty Service – If you're within the 1- time manufacturer’s bond and have your evidence of purchase you're entitled to service or replacement. However, you may be entitled to fresh options, If you have bought a CarePak Canon extended bond. Please produce or log into your Canon Account to gain service. Out of Bond – If you're outside of your bond period, you may qualify for copping a relief through the Canon Upgrade Program. |
| E09 | 1890 | Protective material or tape may still be connected to ink cartridge holder. | Make sure the defensive material and vid have been removed from the FINE cartridge holder. Pull out the paper charger extension and paper affair charger. Remove any of the defensive material. Close the cover. |
| E11 | Unable to access printing with current print settings. |
Alter the print settings and try again. | |
| E12 | Specified data can’t be printed. | If you publish with CREATIVE Demesne Decoration contents Check the communication shown on your computer. Make sure genuine Canon FINE charges are installed duly for all colors. Try to print again. |
|
| E13 | The ink may have run out. | The function for detecting the remaining essay position is impaired. Still, press the printer's Stop button for at least 5 seconds, If you want to finish to print without this function. Canon recommends to use new genuine Canon charges in order to gain optimum rates. |
|
E14 | Ink cartridge can’t be identified. | The cartridge may not be installed duly or may not be compatible with this printer. Install the applicable essay cartridge. Still, press the printer's Stop button, If you want to cancel printing. |
|
E15 |
Ink cartridge can’t be recognized. | Replace the FINE cartridge. Still, the cartridge may be damaged, If the error is not resolved. Service is needed. There are two options presently available to you. Warranty Service – If you're within the 1- time manufacturer’s bond and have your evidence of purchase you're entitled to service or replacement. However, you may be entitled to fresh options, If you have bought a CarePak Canon extended bond. Please produce or log into your Canon Account to gain service. Out of Bond – If you're outside of your bond period, you may qualify for copping a relief through the Canon Upgrade Program. |
|
E16 |
The ink are empty. | Replace the essay cartridge and close the cover. To finish a print job, press the printer's Stop button for at least 5 seconds with the essay cartridge installed. Printing can continue under the essay out condition. The function for detecting the remaining essay position will be impaired. Replace the empty essay cartridge incontinently after printing. |
|
E23 |
IP address and subnet mask are conflicting. | Press the printer's OK button. Directly unable the wireless direct or alter the wireless network configuration. Note When changing the network configuration, specify a unique subnet range for the wireless direct and the wireless network to help a conflict. For details on changing the network configuration, relate to the attestation for your wireless router. |
|
E31 |
Failed in wireless setup. | Tap the printer’s black or color button to fix this error. Verify the security settings and begin the setup again. Execute the setup using another setup system. |
|
E32 |
Can’t locate a wireless router during setup. | Click on the printer’s black or color button to fix this error. Execute wireless setup again after about 2 minutes. If this doesn’t fix, refer to instruction manual. |
|
E33 |
Can’t connect because several routers are connected to the printer. | Tap the printer’s black or color button to fix this error. Execute the wireless setup again after about 2 minutes. In case it doesn’t solve the issue, go to the instruction manual for the wireless router. |
|
E34 |
Easy wireless connect has failed. | Tap the printer’s OK button and retry Easy Wireless Connect. In case the error isn’t resolved, use another method to setup the wireless connection. |
|
E36 |
Easy wireless connect has failed. | Tap the printer’s OK button and retry Easy Wireless Connect. In case the error isn’t resolved, use another method to setup the wireless connection. |
|
E37 |
Failed in wireless setup |
Tap the printer’s OK button and retry Easy Wireless Connect. Perform the following: Switch off the wireless router and switch it on again. Reconnect the printer to the wireless router. In case it doesn’t solve the problem, go to the instruction manual for the wireless router. |
|
E38 |
Can’t change to a wireless router. Cannot change the wireless settings. |
Tap the printer’s OK button and retry Easy Wireless Connect. Verify the following details- Printer’s wireless connection is enabled. Proper wireless router is chosen to connect. Passphrase you entered is correct.SSID name is correct. After verifying the above, switch on the wireless router off then on again.While using wireless network, you can’t change network settings.Modify them when you are not using wireless for anything. |
|
E39 |
Network error has occurred. | Switch off the printer and then back on. In case your product issue hasn’t been resolved after executing the above steps or in case you need extra help, you can create or login to your Canon account to see your technical support options. Or if you still require help, visit our Canon Community by tapping the button below to get answers. |
|
E45 |
Can’t connect to network | Tap the printer’s OK button to fix the error. Verify the wireless connection and network settings. Connection may be successful after some time. |
|
E46 |
Can’t connect to network | Tap the printer’s OK button to fix the error. | |
E47 |
Cannot connect to server | Click the printer’s OK button to fix the error. Incase you are using Google Cloud print, it’s possible that your printer is registered. Ensure that your printer is registered. |
|
E48 |
Cannot connect to server | Click the OK button to resolve the error and try again in a few minutes. |
|
E49 |
Failed to connect to internet because the network connection is being prepared. |
Click the OK button to resolve the error and try again in a few minutes. | |
E50 |
Failed in acquiring contents. | Click the OK button to resolve the error and try again in a few minutes. |
|
| E51 | Cannot connect to server. | Click the OK button to resolve the error and try again in a few minutes. |
|
E52 |
Failed in registering the printer to Google Cloud Print due to timeout. |
Click the OK button to resolve the error. | |
E53 |
Only information registered to the printer is deleted because of failing to connect with Google Cloud Print. |
Click the printer’s black or color button to resolve the error. Delete registered information of Google Cloud print from your computer or smartphone. |
|
E54 |
Only information registered to the printer is deleted because of failing to connect IJ Cloud Printing Center. |
||
E55 |
The printer is already registered to IJ Cloud Printing Center. |
||
E56 |
The online service is not available in your region. | Tap the printer’s black or color button to fix this error. In case your product issue was not resolved after executing the above steps or incase you notice additional help, you can create or log in to your Canon account to see your technical support options. |
|
E57 |
Scanning print head alignment sheet failed. | Tap the printer’s button and verify the following –
The print head alignment sheet is set in the right position and orientation on the glass surface.
The glass and the print head alignment sheet are both clean.
You insert A4 or letter-sized plain paper. The print head nozzle isn’t clogged. Verify the print head condition by printing the nozzle check pattern. |
|
E58 |
Try to start copying before registering the paper size. |
Mention the paper size and start printing. Tap Stop button to cancel copying. |
|
E59 |
Paper settings for printing don’t match paper information set on the printer. | Tap the printer’s stop button to cancel printing. Ensure the paper is inserted in the rear tray matches the paper size chosen with the printer’s Paper Select button. After verifying the paper settings, retry printing. |
|
E61 |
Scanning original has failed. | Tap the printer’s OK button and follow the mentioned steps below: Ensure that the original is placed on the platen glass. Ensure that the authentic is set in the correct position and orientation. After executing above steps, retry scanning or copying. In case the error is still isn’t resolved then specify the size of the original. |
|
E62 |
Unexpected error occurred while scanning is in progress. |
Click the printer’s black or color button to fix this error. Modify settings and try again to print. |
|
E63 |
Reached the upper limit of pages which can be saved. | Tap the printer’s black or color button to resolve the error. Save the rest of the pages in a different file. |
|
E64 |
Scanning original has failed. | Click the printer’s black or color button to fix this error then verify the following: Ensure the original is placed on the platen glass. Ensure the authentic is set in the correct position and orientation. Then try printing again. |
|
E65 |
Saving scanned data failed because the printer’s memory is full. | Tap the printer’s black or color button to fix this error. Minimize the resolution and rescan the authentic or minimize the amount of the original to be scanned at one time. |
In case the above steps don’t work, you need professional as well as technical guidance. You can call on our Canon printer support number to receive the help. We are available 24/7/365 to help in resolving your queries and issues. Just reach out to us.
Canon is considered as one of the well-known reputed names across the whole industry for decades in the market today mentioned as the rep...
Every time you publish a runner, there's a waste essay that needs to be gutted.
Canon printers have a medium that enable...
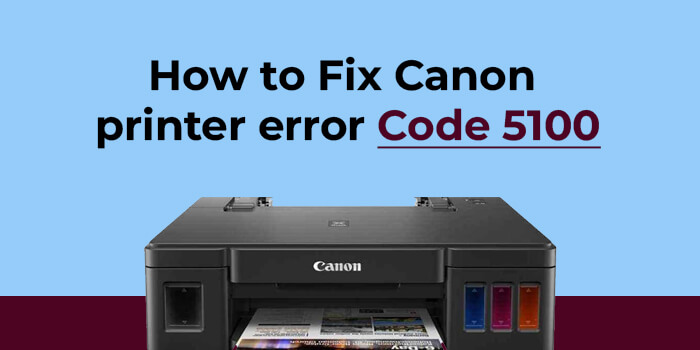
This Canon printer error code 5100 notifies about the existence of a problem in the ink cartridge, mainly related to the jamming of the c...
We are an independent organization that provides help to the Canon Printer users. The data, images and logo used in this website are for representation and information purpose only. We are not directly associated with the Canon Printers. Before going through this website, check the Terms and Condition.